What is Foot Printing?
Foot printing is used to gain information about the target system. This is used before launching the attack. To do foot printing, we can use some tools, such as DNS queries, whois, Nmap, etc.
What information can we get from doing this?
By doing foot printing, we can gather information of the target such as:
- Network Information, such as IP address, domains, DNS record
- System Information, such as OS used for the website
- Organizational Information, such as the physical address of the owner
Tools:
What are the tools that can be used to do foot printing?
- Whois
- Sam Spade
- Nmap
- nslookup
- Maltego
as cited from https://hackernoon.com/https-medium-com-aamralkar-footprinting-and-reconnaissance-e14010b22a89, there are a lot of different foot printing method,
- Footprinting through Social Media, this one is the most easiest to do mostly attacker will create fake account/ids and tries to gather as much as possible information about the target Organization.
- Footprinting through Search Engines like bing, google and duckduckgo. My favorite is duckduckgo. Attackers also look for cache and archives. Some of the good tools are netcraft, shodan, pipl, Google Earth. in order to perform footpriting.
- Footprinting through the Job sites. Hackers will come to know what tools and technology organization is working on.
- Target Monitoring through the Alerts like google alerts, twitter alerts, yahoo alerts.
- Another good method is via Google Hacking databases and Advance search queries. Query string can be used in search and can be used as keywords. Also Google Advance Search Operators can be utilized. For example “intitle index of” list down all the sites with index open. securityfocus.com, hackersforcharity.org/ghdb are few sites where you can get most of the info.
- Website footprinting is monitoring the target organization website. Web server details, directory structure, developers email id are some of the common info. Also tools available where we can mirror the whole website. Backdated website information can be extracted from archive.org.
- Email tracking is used to track the emails. Emails are used to gather information in order to perform the social engineering and many other attacks, Spam.
- DNS Information attackers can get the hosts in the network. Hackers can get A, CNAME, PTR, MX, NS, HINFO records. There are lot of command line utilities available to get the DNS information. nslookup and dig are the most common among the tools.
- WHOis attackers perform WHOis to understand whois behind a specific domain? ARIN, AFRINIC, RIPE. APNIC, LATNIC are the RIR’s (Regional Internet Registry). We can get info from WHOis like email, domain owner, address, name servers for the domain, registrar.
- Network Footprinting
- Footprinting through Social Engineering. Eavesdropping, Shoulder Surfing, Dumpster Diving.
Techniques & Steps for doing foot printing
-
Ping Sweeps
You can ping the network to check their ip address, for example, you want to check google’s ip address, do
ping google.com
-
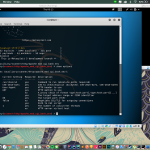
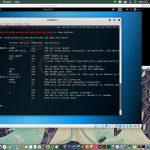
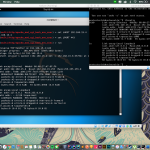
The Harvester
The harvester is a tool in Kali linux for gathering information of e-mail and accounts and subdomain names from public places such as google, baidu, bing, etc.
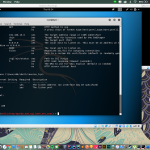
These are the options in using the harvester:
- -d: Domain to search or company name
- -b: data source: baidu, bing, bingapi, dogpile, google, googleCSE, googleplus, google-profiles, linkedin, pgp, twitter, vhost, virustotal, threatcrowd, crtsh, netcraft, yahoo, all
- -s: start in result number X (default: 0)
- -v: verify host name via dns resolution and search for virtual hosts
- -f: save the results into an HTML and XML file (both)
- -n: perform a DNS reverse query on all ranges discovered
- -c: perform a DNS brute force for the domain name
- -t: perform a DNS TLD expansion discovery
- -e: use this DNS server
- -p: port scan the detected hosts and check for Takeovers (80,443,22,21,8080)
- -l: limit the number of results to work with(bing goes from 50 to 50 results, google 100 to 100, and pgp doesn’t use this option)
- -h: use SHODAN database to query discovered hosts
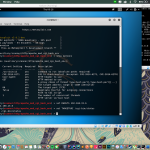
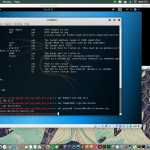
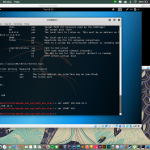
example of usage
theharvester -d binus.ac.id -l 500 -b google
-
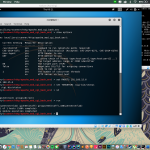
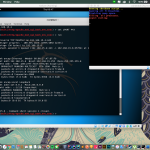
Whois
whois is used for getting the data about the url you’re looking for, such as the registrar, the ip, etc
usage of whois
whois google.com
-
Google Dorks
Google can also be used for gathering sensitive information. Google Dorks are simply ways to query Google against certain information that may be useful for your security investigation.
Some popular operators used to perform Google Dorking:
- Filetype: you can use this dork to find any kind of filetypes.
- Ext: can help you to find files with specific extensions (eg. .txt, .log, etc).
- Intext: can perform queries helps to search for specific text inside any page.
- Intitle: it will search for any specific words inside the page title.
- Inurl: will look out for mentioned words inside the URL of any website.
example of google dorks
filetype:pdf site:"*.com"